
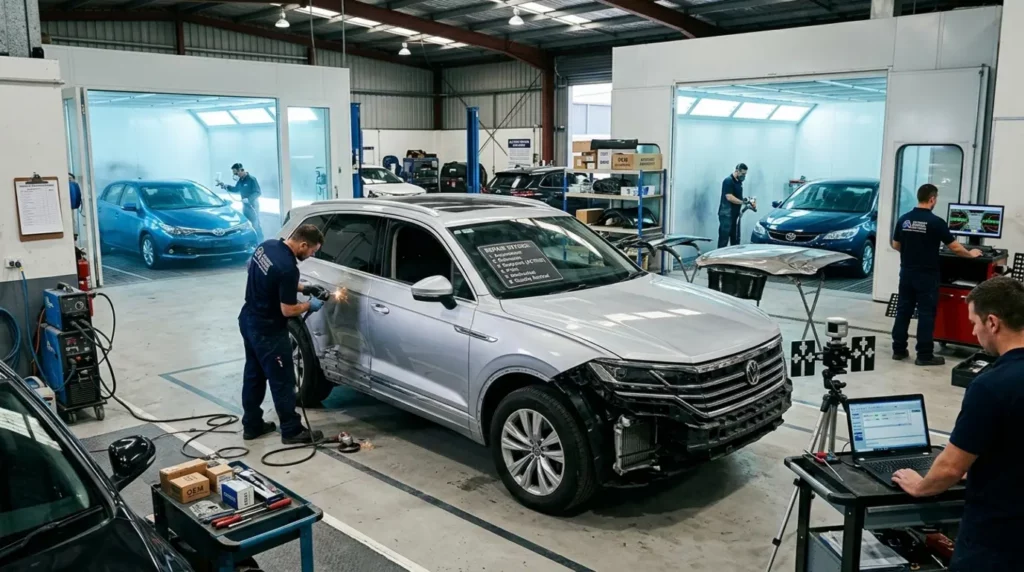
Accident repair follows 6 sequential stages: damage assessment, repair estimation, bodywork restoration, paint refinishing, mechanical recalibration, and quality control handover. Each stage directly determines structural integrity, cosmetic finish, and post-repair roadworthiness, making the full process essential, not optional.
Understanding each stage helps you track progress, ask the right questions, and recognize when repairs fall below the required standard. This guide covers every phase from initial collision damage inspection to final vehicle handover, including what parts are ordered, how paint blending works, and what your quality control checklist must include.
Contents
- What Does a Collision Damage Assessment Actually Check?
- How Does the Repair Estimate Work and How Are Replacement Parts Ordered?
- Panel Repair vs Panel Replacement: How Bodywork Restoration Is Decided
- How Does the Accident Repair Paint Process Work: Surface Preparation, Colour Match, and Panel Blending?
- What Mechanical Checks Are Required After Accident Repairs: Wheel Alignment, Suspension, and Safety System Calibration?
- What Does the Quality Control and Vehicle Handover Checklist Cover?
- What Steps Do You Take When Accident Repair Quality Falls Below Standard?
What Does a Collision Damage Assessment Actually Check?
A collision damage assessment checks 4 distinct layers: visible bodywork deformation, structural frame integrity, mechanical system displacement, and pre-repair diagnostic fault codes. The assessment establishes the full repair scope before any authorisation is given, preventing estimate supplements mid-repair.
Certified technicians begin with a visual inspection of exterior body panels, documenting dents, panel misalignment, and paint fracture points. A pre-repair OBD-II diagnostic scan follows, identifying fault codes stored in the vehicle’s electronic control units triggered by the collision impact even when dashboard warning lights remain inactive.
The structural damage assessment uses a vehicle measuring system to check frame geometry against manufacturer tolerances. Frame deformation as small as 2mm can compromise crumple zone performance and airbag deployment timing in a subsequent collision. Suspension geometry is measured at this stage to identify subframe displacement and strut tower damage.
The full damage assessment covers the following areas:
• Exterior panel deformation: dents, creases, and panel separation
• Structural frame geometry: measured against OEM vehicle tolerances
• Electronic control unit fault codes: pre-repair diagnostic scan
• Suspension geometry: subframe alignment and strut mount condition
• Advanced driver assistance system sensors: camera and radar displacement
• Airbag and restraint system status: deployment history and sensor integrity
You receive a written damage report at the end of the assessment stage. This document forms the foundation for the insurance claim submission and the formal repair estimate.
How Does the Repair Estimate Work and How Are Replacement Parts Ordered?
The repair estimate documents all labour operations, parts requirements, and paint refinishing costs using an industry estimating system such as Audatex or GT Motive. Parts sourcing begins immediately after insurance authorisation, with OEM, approved alternative, and reconditioned components selected according to the insurer’s agreed parts policy.
Estimators categorise each damaged component as repairable or requiring replacement. Repair decisions follow manufacturer repair method guidelines not cost assumptions. A bonnet with localised surface deformation qualifies for panel pulling and reshaping, while a bonnet with creased reinforcement rails requires full replacement to maintain pedestrian impact compliance.
Parts are classified into 3 categories for ordering purposes:
• OEM parts: manufactured to original equipment specification by the vehicle’s manufacturer or licensed supplier
• Approved alternative parts: independently certified components meeting equivalent dimensional and material standards
• Reconditioned parts: salvage components assessed and certified to remanufacturing standards, commonly used for structural assemblies on older vehicles
Supplement estimates occur when disassembly reveals hidden damage not identified during the initial visual inspection. The repair centre documents the additional damage with photographs and revised part numbers, submitting the supplement to the insurer for authorisation before work proceeds. You are informed of all supplement changes before additional work begins.
Panel Repair vs Panel Replacement: How Bodywork Restoration Is Decided
Panel repair applies to deformation without structural compromise technicians use resistance spot welding repair, panel pulling, and plastic reshaping tools to restore the original geometry. Panel replacement applies when deformation exceeds the manufacturer’s published repair threshold, when reinforcement structures are compromised, or when corrosion protection layers are irreparably damaged.
Bodywork repair uses paintless dent removal (PDR) for minor panel intrusions without paint fracture a technique that preserves the original factory lacquer layer and requires no refinishing. PDR applies to hail damage, minor door dings, and low-velocity impact depressions where the paint film remains intact.
Panel replacement involves full removal of the damaged component, preparation of the replacement panel’s corrosion protection coating, and reattachment using the vehicle manufacturer’s specified joining method. High-strength steel and ultra-high-strength steel panels require MIG brazing rather than MIG welding in designated zones to preserve tensile strength. Using the incorrect joining method in these zones reduces structural rigidity by up to 30%, according to vehicle manufacturer repair guidelines.
Plastic bumper fascias undergo heat reforming for minor deformation. Deep splits, mounting point fractures, and deformation exceeding 15mm in the energy absorber foam require full assembly replacement to maintain pedestrian protection and low-speed impact standards.
How Does the Accident Repair Paint Process Work: Surface Preparation, Colour Match, and Panel Blending?
The accident repair paint process follows 5 sequential stages: surface decontamination, primer application, base coat colour match using a spectrophotometer, clear lacquer application, and adjacent panel blending. Each stage directly determines whether the refinished area integrates visually with surrounding panels under all lighting conditions.
Surface preparation begins with chemical decontamination of the repair area, removing silicone, wax, and road film contamination. Technicians apply a 2K polyurethane primer to bare metal, filling surface irregularities and establishing adhesion for the base coat. The primer layer is flatted with 320–400 grit abrasive paper before the colour application begins.
Colour matching uses a spectrophotometer to scan the vehicle’s existing paintwork, measuring hue, saturation, and metallic flake orientation angle. The spectrophotometer compares measurements against a manufacturer’s database containing over 150,000 paint formulations. For aged vehicles where oxidation and UV degradation have shifted the original colour, technicians adjust the tint formula before mixing the base coat batch.
Panel blending addresses a fundamental limitation of automotive refinishing: even a perfect spectrophotometer match appears visually different when applied next to weathered, aged paintwork. Blending extends the base coat application into adjacent undamaged panels using fade-out thinners, creating a gradual transition that the human eye cannot detect. The blended area receives a full clear lacquer layer, and the lacquer is polished to restore gloss uniformity across the repaired section.
The complete refinishing process covers the following stages:
• Decontamination wash: silicone, wax, and road contaminants removed
• 2K primer application: adhesion layer and surface filling on bare metal
• Primer flatting: 320–400 grit surface preparation for base coat adhesion
• Spectrophotometer colour scan: hue, saturation, and metallic flake measurement
• Base coat application: 2–3 coats with interlayer flash-off times observed
• Panel blending: fade-out thinner application across adjacent panels
• Clear lacquer: UV-protective topcoat applied over full refinished area
• Machine polishing: gloss restoration and orange peel removal
What Mechanical Checks Are Required After Accident Repairs: Wheel Alignment, Suspension, and Safety System Calibration?
Post-repair mechanical verification covers 4 critical systems: wheel alignment geometry, suspension component integrity, braking system performance, and advanced driver assistance system (ADAS) sensor recalibration. Each system requires independent verification passing one does not confirm another.
Four-wheel laser alignment confirms that toe, camber, and caster angles return to manufacturer tolerances after structural repair. Misalignment of 0.5 degrees in rear toe angle causes premature tyre wear and directional instability. The alignment report documents pre- and post-adjustment measurements, providing verifiable evidence that the vehicle’s suspension geometry meets OEM specification.
Suspension inspection examines strut mounts, shock absorber housings, control arm bushings, and anti-roll bar linkages for deformation and fatigue fracture. Rubber suspension bushings absorb energy during the impact event technicians replace bushings showing compression set or structural cracking even when no visible deformation exists.
ADAS sensor recalibration is mandatory after any repair affecting the vehicle’s front-end geometry, windscreen replacement, or bonnet alignment. Forward-facing radar sensors require static calibration using manufacturer-specific targets positioned at precise distances. Lane departure warning cameras require dynamic calibration on a defined road circuit. Failure to recalibrate ADAS sensors after collision repair creates a critical safety deficiency — sensors operating on pre-collision positional data produce incorrect warnings and delayed emergency braking responses.
A post-repair OBD-II diagnostic scan confirms all electronic control units are clear of fault codes. The post-repair scan result is compared directly against the pre-repair scan baseline to identify any codes introduced during the repair process.
What Does the Quality Control and Vehicle Handover Checklist Cover?
The quality control inspection verifies 5 areas before handover: cosmetic finish accuracy, panel gap and flush alignment, mechanical system function, ADAS calibration completion, and documentation integrity. A vehicle that passes all 5 areas receives a repair completion certificate and is cleared for collection.
The cosmetic inspection examines paintwork under high-intensity lighting for orange peel, solvent pop, dirt inclusion, and colour variation between the repaired and adjacent panels. Panel gap measurement confirms door, bonnet, and bootlid gaps fall within a 3–5mm tolerance band, matching the manufacturer’s assembly specification.
A supervised test drive confirms steering response, braking linearity, and suspension noise before handover. The test drive route includes a minimum road speed sufficient to activate ADAS systems, confirming lane departure, adaptive cruise, and automatic emergency braking systems operate correctly in live traffic conditions.
The vehicle handover checklist confirms the following are complete before key release:
• Post-repair OBD-II diagnostic scan: all fault codes clear
• Four-wheel alignment report: pre- and post-repair geometry recorded
• ADAS calibration certificate: sensor targets and calibration method documented
• Refinishing quality inspection: paint film measurement readings recorded
• Parts invoices: OEM or approved parts specification confirmed
• Repair warranty document: minimum 2-year bodywork and paint warranty issued
• Test drive record: route, mileage, and system confirmation signed off by technician
You inspect the vehicle jointly with the service advisor at handover. Raise any concerns before signing the collection document post-signature disputes are harder to resolve than pre-handover defect notifications.
What Steps Do You Take When Accident Repair Quality Falls Below Standard?
When accident repair quality falls below standard, you document the defects with date-stamped photographs and submit a written defect notification to the repair centre within 48 hours. The repair centre carries a legal obligation under the Consumer Rights Act 2015 to re-inspect and rectify substandard workmanship at no additional cost.
Colour mismatch between repaired and adjacent panels is the most common post-repair defect. A clearly visible colour differential under natural daylight indicates either an incorrect tint formula, insufficient blending, or omission of the blending stage. This defect is correctable through re-refinishing the repair centre sands the affected panels back to primer and restarts the base coat and blending process.
Panel misalignment uneven door gaps, bonnet offset, or bumper fascia separation indicates incorrect panel fitting or insufficient structural alignment. The repair centre disassembles the affected assemblies, adjusts mounting positions, and re-checks gap measurements before refitting.
Mechanical defects discovered after collection pulling under braking, directional instability at motorway speed, or ADAS false activation require immediate return to the repair centre. These defects indicate incomplete alignment correction or ADAS calibration failure and carry a safety classification that supersedes cosmetic concerns.
If the repair centre declines to rectify confirmed defects, the escalation process follows this sequence:
• Submit a formal complaint in writing to the repair centre manager, citing specific defects and the Consumer Rights Act 2015
• Request an independent engineer’s report through your insurer or a vehicle inspection service
• Escalate to the Motor Ombudsman if the repair centre holds a Trading Standards-approved code membership
• Pursue small claims court proceedings for quantifiable financial losses if alternative dispute resolution fails
How Long Do Accident Repairs Usually Take?
Accident repair duration ranges from 3 working days for minor single-panel damage to 15 working days for multi-panel structural repairs involving frame straightening and ADAS recalibration. Parts availability is the primary variable OEM parts for specialist or recently launched vehicles carry lead times of 5–10 working days from manufacturer depots.
The repair centre provides a formal repair duration estimate at the authorisation stage. This estimate covers all confirmed repair operations and accounts for known parts lead times. Supplement repairs discovered during disassembly extend the duration the repair centre notifies you and provides a revised completion date before proceeding with additional work.
Will the Repaired Paint Match Perfectly?
A spectrophotometer-matched refinish on a properly blended panel achieves a visually indistinguishable result under standard lighting conditions for vehicles up to 5 years old. Vehicles beyond 7 years carrying significant UV-induced paint oxidation present a greater colour matching challenge the base coat tint formula requires manual adjustment beyond the spectrophotometer baseline reading.
You can verify paint match quality by inspecting the vehicle under natural daylight at varying angles before signing the handover document. Metallic and pearlescent finishes reflect light directionally inspect the blended panels from both perpendicular and oblique angles to confirm the metallic flake orientation matches the unrepaired panels.
Do Accident Repairs Affect the Vehicle’s Resale Value?
A fully documented accident repair carried out by an approved repair centre using OEM parts and manufacturer repair methods produces a negligible impact on resale value. Undocumented repairs, incorrect structural repair methods, and non-OEM parts represent the primary causes of post-accident vehicle value reduction not the collision event itself.
You retain all repair documentation parts invoices, alignment reports, ADAS calibration certificates, and the repair warranty as this evidence demonstrates the quality of the restoration to prospective buyers. HPI and vehicle history data services record insurance-claim repair histories, which prospective buyers access during pre-purchase checks. Complete documentation counters the negative impression created by a recorded claim marker.
Can You Choose Your Own Accident Repair Centre?
Yes. UK motorists hold the legal right to choose their preferred accident repair centre regardless of insurer recommendation. Insurers maintain approved repairer networks and may offer additional guarantees for network repairs, but the policyholder retains the statutory right to select a non-network repairer.
Choosing a repairer outside the insurer’s approved network may require you to obtain 2 or 3 competitive estimates and submit these to the claims handler for authorisation. The insurer assesses the estimate against its standard repair rate schedule and authorises work up to the agreed value. You are responsible for costs exceeding the authorised amount if your chosen repairer’s labour rates or parts pricing exceeds the insurer’s schedule.
Approved network repairers carry manufacturer-certified technician status, invest in approved calibration equipment, and adhere to manufacturer repair method documentation. These qualifications ensure structural and electronic repairs meet the safety standards the vehicle was engineered to deliver.